
This article is all about how to build your own DIY subwoofer. When I first started researching the DIY subwoofer building, I found out all of this stuff by trawling the internet and asking on forums. I think this guide will help people who want to build a subwoofer or two, but don't really know what's involved.
For a relatively low budget and some time, you can make something that matches or beats the performance of a considerably more expensive commercial subwoofer. The reasons for this are simple. Commercial subwoofer manufacturers have to compromise to some degree with the size of the cabinet and the cost of components to be able to make something that appeals to the masses and is also cost-effective, so they can make a profit. Of course, when you're building your own DIY subwoofer, you shouldn't have to worry about these things and, instead, you can concentrate on getting the best performance you can get for your money. The other nice thing about making your own is that if you are creative, you can have it look however you want. I've included some pictures of inventive DIY subwoofers that people have made.

Why Do I Need a Subwoofer?
The reasons for this are simple. The human range of hearing is 20hz up to 20000hz. 20hz is a very low bass and 20000 Hz (20khz) is very high.
If you take a soundtrack from a film, then, in some cases, the frequency range of the sounds in that film range from 10hz (which is below the human range of hearing) up to 20khz. To be able to accurately reproduce the soundtrack as it was designed to be heard and felt, you need speakers that can reproduce that full range. Most speakers are able to reproduce the higher end of the range, but, at the low end a lot of power is needed and the majority of speakers (even large floor standers) simply cannot reproduce that sound. Most speakers, even large floor standing speakers, tend to only be able to play down to about 40hz. This is when the subwoofer is useful. They are designed to only reproduce low frequencies. This underpins the sound coming from the main speakers, allowing the full range to be experienced.
If you don't have a subwoofer, then you're missing out!
What Is a Subwoofer Made of?
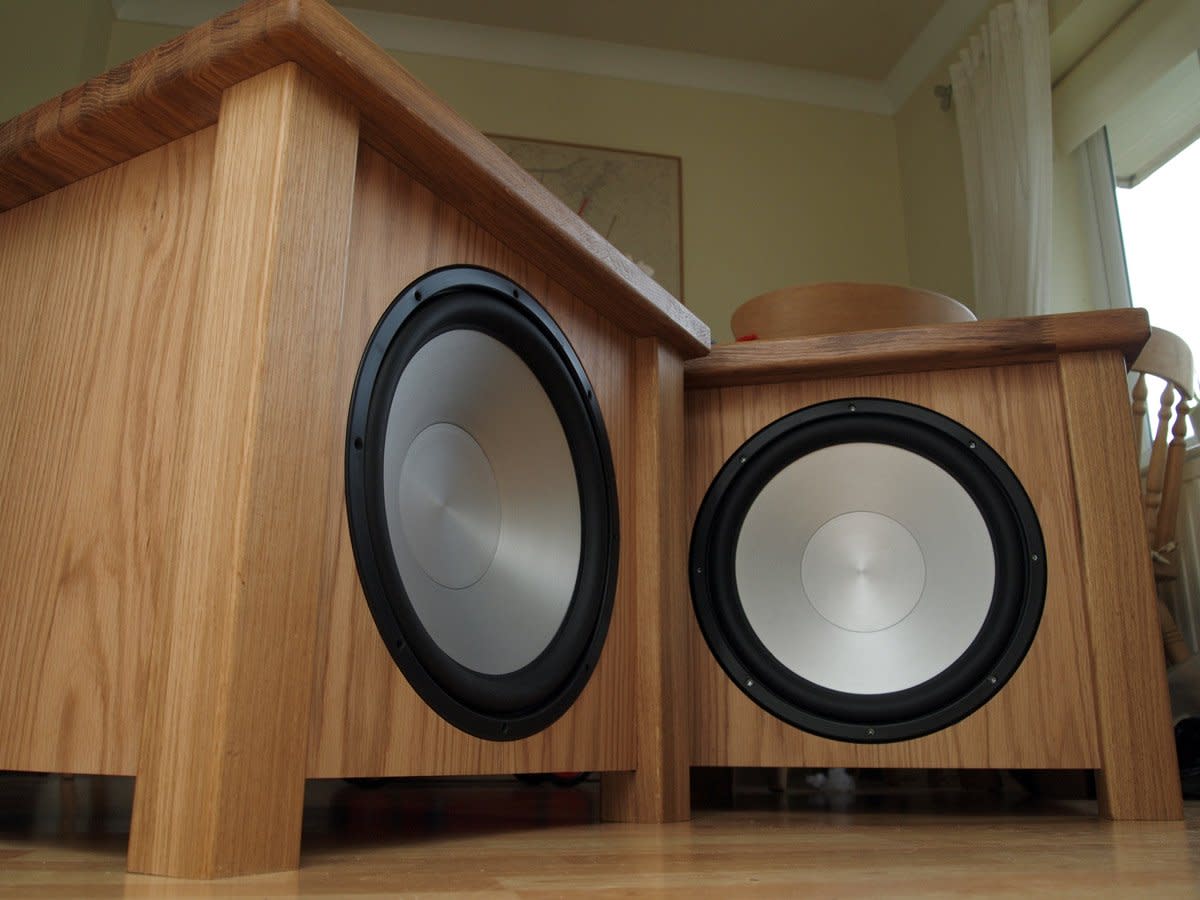
There are not too many components needed to make your own DIY subwoofer. Apart from the necessary woodworking tools, the most important component is the drive unit (or driver). There are lots of different choices available. Personally, I have had great results with the Fi Car Audio Q18 driver.
The enclosure is the box/cylinder that the driver fits into. Although there are various factors to adhere to when designing. Generally, the important factor is the internal volume. As long as you have this, then you can use whatever shape enclosure you like, within reason. Boxes and cylinders are the most common, although there are some crazy looking DIY subs out there, made from missile nose cones, food bowls, and all sorts of other items. Most people use MDF to create boxes and cardboard/metal for cylinders.
What Components Will Be Needed?
In addition to the box materials and drivers, you'll also need:
- An amplifier to power the subwoofer. I've used several, but the Behringer EP4000 is the one I use now. It's powerful, cheap, and has two channels so you can run two subwoofers from it with ease.
- Speaker terminals, cable, and feet.
- If you're making a box, you'll need varnish or paint.
- For cylinders, you will need foam and fabric.
- If you're making a ported subwoofer, then you'll need material for a port. Drainage pipe is a good choice for this as it is cheap and easy to find and does the job perfectly well.
- Damping material inside the enclosure. You can use either acoustic foam or insulation. Acoustic foam can be expensive, so a cheaper option is foam carpet underlay. For insulation use fiberglass. Some people also use pillows.
There is no need to stuff the enclosure completely, but it's worth having some in there if it's a box. If it's a cylinder you're building, then, ideally, you want the internal walls lined with insulation. This stops boominess and ringing.
Which Is Better? A Sealed or Ported Subwoofer Design?
There are quite a few different designs out there. If you're going DIY, you need to think about what you're going to build. In this guide, I'm going to talk about the two main types, which are sealed and ported subwoofers. There are pros and cons to both types. There is a lot of information on this out there, so I'm not going to go too in-depth with this or I'll be here for years. So, I will give a basic outline of the differences.
Sealed
This is a driver inside a sealed box. The drive unit is damped by the air inside the box. As the sound gets to the limits of an excursion, there is a lot of damping from the air, which means that you need a lot of power to drive it. If the enclosure has been made properly, then it will be airtight.
Ported
This type of subwoofer has a port that lets air in and out of the box freely as the drive unit moves back and forth. This will boost the output of the sub so it can play louder. The driver is not damped by air inside the enclosure, so less power is needed.
Pros and Cons
Now, there are pros and cons to both designs. A sealed subwoofer can be smaller than ported ones. The sound quality of a sealed sub is generally thought to be superior, although this is something that is debated, with people belonging to both camps. Since the driver is damped and the port doesn't boost the output, a lot more power and equalization is needed to get the equivalent SPL levels of a ported sub. If you have a lot of power available, then its not necessarily a problem. But, this is something worth bearing in mind.
When you're building a DIY sub, you can often find a way to accommodate either design. There is usually some space that can be utilized, in even the smallest room.

Cylinder or Box?
Cylinder
There are various options available to you. The simplest type of DIY subwoofer to build is a cylindrical design. This is because if you can get hold of a cylinder or two, then all you really need to do is make the end caps to fit on either end of the sub. Braces are not necessary. This is fairly straightforward.
Box
Box design can be perfectly fine as well but obviously takes a bit more work. It's recommended to brace the inside if you're going to build a box as you don't want it flexing. The most important factor for either design is the internal volume. This is the thing you need to get right. With a ported subwoofer, you have to decide on the tune that you are going to have. This is the frequency range that will get boosted by the port. Below the tuning point, the speaker is not damped at all, so you have to be careful you don't overdrive it because you can blow the driver. A good tune to aim for, in my opinion, is 15 Hz. This is a low tune (below the level of hearing), and you will get good output from 15hz upwards. The only downside to this is that the box will need to be pretty large, potentially several hundred liters.
Programs
A nice and easy program to use if designing a DIY cylinder subwoofer is Sonosub. This program allows you to input some ideal parameters, and it will then tailor the measurements that you will need, such as cylinder length, port length, etc. This makes things very easy to work out.
If you're going to make a box, then I would recommend you get familiar with is a program called WinISD. Again, this allows you to input your parameters and model the sub before you get the tools out. Both of these programs are free, so type their names into google and you'll find them for download pretty easily.

How Do I Choose the Components, Size, Tune, Etc.?
The best bet is to see what your maximum budget and size restraints are and work from there. You also need to decide whether you're going to go for ported or sealed. As I stated earlier there are a lot of opinions on this, so I can't make up your mind for you. I have had both types and had good results from both. Currently, I favor the sealed sub.
Sometimes, the size you can accommodate will make the decision for you. If you don't have a lot of room, then sealed is probably a better choice because the enclosures are smaller than an equivalent ported sub. If you have a lot of room, then you can have either.
I would say that you're best to go for the largest driver you can accommodate. The larger the driver, the less you're going to have to push it to get the required output. The closer you push a driver to its max output, the more distortion you start to get, which degrades the sound quality. Have more output than you need, rather than needing more output than you have. You don't have to have it maxed out, even if you have very large subwoofers. So you needn't worry about blowing the house down, as long as it's calibrated properly, then everything will be fine.
The size of the sub that you're going to be able to build will dictate what size driver you can use. If you can fit several hundred liters, then an 18-inch driver would be ideal. If you're looking at much less, then a 15 or maybe even a 12 inch would be better. The price difference between different sizes is negligible, so my advice is to get the biggest you can.
Which Amplifier?
Once again, there are different types of amps available. If you're going for a ported design, then a plate amp might be sufficient for your needs. These are amps that don't come in a separate box, so they will need to be built into the sub enclosure. They tend to not be as powerful as power amps, but they generally are fanless, so they make no noise. You'll need one per sub.
Another good and popular choice for DIY subwoofer builders is the Behringer range of amplifiers. These are power amps typically used for DJ / PA work. They are a standalone design. They have plenty of power and you can run multiple subwoofers from them. If you're going to run with a sealed design or multiple subs, or both, these are good choices as they provide lots of power and are relatively cheap. The EP4000 is a popular choice and is the one I personally use. They do not whisper quiet in their default setting, but it is pretty easy to replace the fan with a quieter version and that makes them a lot more palatable for a quiet home theater setting.

Is It True That a Large Enough Subwoofer Can Reproduce Infrasonic Bass?
If you have powerful enough subwoofer(s), then you can reproduce frequencies below 20hz as well as above. This takes a lot of power and large drivers because there is a lot of air to be moved by the driver at these low frequencies. This sort of bass is known as infrasonic, although some incorrectly refer to it as subsonic.
This isn't the sort that you can just hear; you can feel it too. This makes films a lot more exciting. When you can feel the bass as well as hear it, there is a lot more impact. You will need a large and powerful sub or subs to achieve this effect. It is certainly worth it, in my opinion. The only thing you have to be aware of is that things tend to rattle and vibrate in the house, so you have to be careful you don't break anything. I have seen before, someone who rattled the sink from another room. That's pretty extreme though, and you're not going to be doing that at a normal day-to-day listening level.
I Have Neighbours / a Wife / Dog That Doesn't like It Too Loud
Most people have someone else to consider when it comes to blasting out their sound system. A common misconception with large subwoofers is that if you get or make something large and powerful, then you'll be blowing the house down and making the neighbors, your wife, parents, or whomever very unhappy.
This is simply not true as long as you've calibrated the system correctly. If it is set up correctly and balanced as it should be, then it will just sound right, without being boomy or overly loud. Even if you have very large subwoofers, this still applies. So, don't feel worried that whatever you make will be too big or too loud. The most important component of all is you with your hand on the volume control.
.")
I'm Going for Sealed!
If you've decided you're going for sealed and you have determined how much space you have, then the next step is to determine the Qtc you're going to go for. This will determine how large your subwoofer will be.
What is Qtc? It is the way the driver will react in the box. A higher Qtc will sound punchier, but not as deep. It will also mean a smaller box. A larger box will mean a lower Qtc, which will go deeper, but not be as punchy. This comes down to personal preference, but the general range recommended is in the 0.5 to 0.8 range. A Qtc of 0.707 will give you the flattest response, but as it will rise a bit in a room anyway, a lot of people aim for something a bit lower, around the 0.6 - 0.65 area.
If you've chosen an 18-inch driver, for example, and want to build a subwoofer with a Qtc of .6, then you're going to need a bigger box than if you're aiming for the same Qtc level with a 15 or 12-inch driver. This is why determining the size you have available is important. Although you can go into more depth, essentially all you need to do is input the driver parameters into a modeling program like WinISD, and then adjust the box volume in the program until you have a desirable Qtc.

I'm Going for Ported!
So if ported is your decision, then you need to think about what tune you're going to optimize your build for. A port boosts the output of the subwoofer, but it will only do that down to a certain frequency. Below that frequency, the output is not boosted and the driver acts like it's in completely free air, with no damping effect from the air inside the sub. This means that excessive excursion can potentially damage the driver. The way some people get around this is by setting the tune of the subwoofer to a tune that is lower than the majority of the material. An example of this is a tune in the 13-15hz range. Since most material you get from films is usually above 20hz, with little below that, then this can be a nice way around it. This does require a large enclosure though, so you could be talking in the 300-600 liter range if you're running with 18-inch drivers. This is not something everybody can do. As always, another thing to bear in mind with speaker design is that if you alter one variable, then something else will change. In the case of enclosure size, the larger you go, the lower the tune. But this also means that you get less punch from the bass.
A 15hz tune is a decent target. I've used this in the past and it is recommended by a lot of DIY sub builders, so that is a nice starting point to aim for. In a similar way to the sealed sub, you need to use a modeling program like WinISD. Input the driver parameters and the tune you're aiming for, and this will give you the volume required for your enclosure. If you're planning on making a cylinder subwoofer, then an excellent program that makes modeling very easy is Sonosub.

I haven't gone into too much detail about how to physically build the things, but what I've covered are all things to bear in mind. Depending on room size, an 18-inch driver in a 100 liter sealed subwoofer or if you have the room, ported 600-liter subwoofer will give you awesome performance (which would cost a small fortune to replicate with commercial subwoofers). If you can fit them in, then do it! If you just want a smaller sub or two, then you use the same principles that apply to larger subwoofers, but just end up with a smaller sub.
I do have another article on here where I detail exactly how I made my own cylinder subwoofers, including lots of pictures of the whole process. If you're interested, then please check that out.
If you have any questions or comments please leave them below and good luck with your DIY subwoofer build! Thanks!
No comments:
Post a Comment